3D Printer Info
Because we believe in integrating new technologies into programs and everyday life to the best of our ability, the PJFL owns and operates several different 3D printer models for library programs and our 3D printing service.
If you are interested in having a 3D design printed, please review the resources below and then click on the link at the bottom to submit your design.
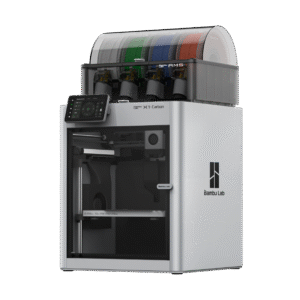
Bambu X-1 Carbon
Adult Department
Build Volume: 256 L x 256 W x 256 H mm (about 10 inches square)
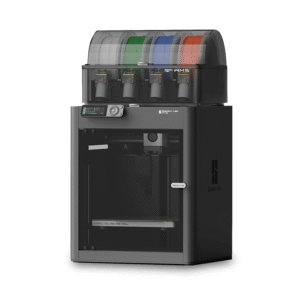
Bambu Lab P1S Combo
Teen Department
Build Volume: 256 L x 256 W x 256 H mm (about 10 inches square)
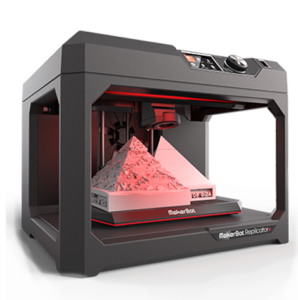
Makerbot Replicator+
Children’s Department
Build Volume: 11.6 X 7.6 X 6.5 inches
This printer offers a larger print volume and added filament colors.
Preparing Your File
Once it has been determined that a submitted file(s) does not violate our Policy on 3D Printing, your project will be included in a printing queue. To learn more about 3D printing and design, continue to read below or view our Events Calendar to register for a program (offered periodically).
1. Creating or editing a model for the 3D Printer
You can design your object in any 3D modeling software of your choosing. Below is a list of Free 3D modeling software and open source model websites.
Ultimate Kids Guide to 3D Printing | Beginner’s Guide To 3D Printing
Free 3D Modeling Software
Recommended! Tinkercad – a browser-based 3D design platform, now part of Autodesk (free version available).
Blender – open source 3D animation suite.
OpenSCAD – free software for creating solid 3D CAD models. Useful for creating models of machine parts.
List of additional free software packages from 3ders.com.
Free Open Source 3D Model Websites
You can search for pre-existing models on the Internet to print as they are, or to modify using 3D modeling software.
Recommended! MakerWorld – Bambu’s searchable design library community.
Thingiverse – MakerBot’s searchable design library community.
Printables – Large 3D design database
3D Warehouse – Sketchup’s searchable design library.
3D Modeling Tutorials
How to fix and repair your 3D files (Shapeways)
Software Tutorials (Shapeways)
3D modeling for beginners (Shapeways)
2. Formatting your File for the 3D Printer
File Type
For Makerbot: Export/download your model as a stereolithography file, with an STL extension (.stl).
For Bambu X1C: Export/download your model as a 3MF file. (.3mf).
Dimensions
Build volume
Makerbot Replicator+ 11.6 L X 7.6 W X 6.5 H inches
Bambu X-1 Carbon 10 L x 10 W x 10 H inches
Resolution
Please note that larger jobs will cost more and will require more time to print. You can specify a different quality level by making a note under “Description & Special Requests” on the 3D Printed Object Request Form.
Multiple parts
Please note that multiple parts may cause a delay in printing your object. If your model includes multiple parts, make each as a separate STL file. You can submit each model as part of the same print request.
Make a solid design
The surface of your 3D model must be watertight. This means all faces of the object must construct one or more closed volume entities. Gaps or holes in the model will cause it to print incorrectly.
See Rhino’s How do I Make a Solid Model.
Geometry check
Check your design for holes, gaps, or other problems before submission. Numerous third party tools can help you fix geometry problems, including:
Shapeways offers a tutorial for fixing and repairing 3D models using these services.
3. Submitting your Model to the 3D Printer
Once your model is ready to go, email us your file and the details of your request to: 3dprint@portjefflibrary.org. A staff member from the Library will contact you within five business days with an estimate for the total cost ($1 per hour) and turnaround time and also let you know if there are any problems with the file.


